Thanks Thanks:  1,025
Likes Likes:  4,138
Page 98 of 148 FirstFirst ... 488896979899100108 ... LastLast
Results 971 to 980 of 1473

Thread: What Did You Do To Your 4th Gen Today?

  1. Top Of Page | #971
    MOD watersupply189's Avatar

    User Info Menu

    Quote Originally Posted by SeveredCummins14 View Post
    Thanks! You would think! Haha not sure why? The factory clear coat they spray probably doesn't help!The tint may work? I'm not sure, these I just buy locally here in California but think Recon offers already smoked markers...more $ and better quality for sure!

    Sent from my SM-G950U using Tapatalk
    Thanks man! I’ll check into those.


    2016 Ram 3500 4x4 Laramie Cummins, G56, Rough Country Leveling, MM3 EGRless Tuned by Double R Diesel

    2016 RAM 3500 4x4 Laramie Crew Cab ,G56

  2. Top Of Page | #972
    SeveredCummins14's Avatar

    User Info Menu

    Quote Originally Posted by watersupply189 View Post
    Thanks man! I’ll check into those.


    2016 Ram 3500 4x4 Laramie Cummins, G56, Rough Country Leveling, MM3 EGRless Tuned by Double R Diesel
    For sure

    Sent from my SM-G950U using Tapatalk

    2014 Ram 3500 CCLB DRW | RaceMe Ultra | Warp Tuning by Double R Diesel

  3. Thanks watersupply189 thanked for this post
  4. Top Of Page | #973
    No Vacancy Power247's Avatar

    User Info Menu

    Quote Originally Posted by SeveredCummins14 View Post
    Four years of Two down...three to go! What a difference!https://uploads.tapatalk-cdn.com/201...029b21f77b.jpg
    2014 Ram 3500 CCLB DRW | RaceMe Ultra | Warp Tuned by Double R Diesel
    Thanks for reminding me how bad mine look up close. . I'm still trying to decide if I want to go back with clears are pick up some tinted LED aftermarket lights...

    Greg
    2012 | RAM 2500 | CCSB | MM3 tuned by Double R Diesel
    2016 | Heartland Pioneer | DS310

    Greg
    2019 | RAM 2500 | CCSB | 6.4 HEMI

  5. Top Of Page | #974
    PWRWAGN's Avatar

    User Info Menu

    Yesterday I installed my Lund Riveted fender flares. They are an easy install but I wanted to do something to protect the paint on my new truck. Sand/grit can and will get between the rubber flare gasket and the truck paint. Over time with the vibration it will scratch/wear the paint down - sometimes to bare metal if enough time is given. I noticed this on my last truck - never got to bare metal but did get through the clear coat.

    To avoid that I decided to try to prevent this... From looking around the web it seems some people were trying to add double sided 3M tape and a few others were using protection film (like a clear bra material). I opted for trying the clear protection film.

    Incase anyone wants to do this Im including a few step photos as there was some trial and error.. First I screwed in the flare so I could see the fit. Once the fender was in place I used some thin masking tape to mark the curve - leaving about 1/8" gap above where the rubber gasket touches the truck. Then removed the fender.


    After that I used a strip of clear protection film which was about 5/8" wide. This was wide enough to fully cover where the rubber gasket hits the paint. Following the tape curve using a squeegee and install methods for that clear protection film. Difficult to see in photo but its there.


    Drying and cleaning the area. Film is installed - was very difficult to get a photo of as it is just about invisible once its on. Only the edges can be seen.


    Here you can see the fender installed again over the clear protection film. Again, difficult to photograph but you can just sorta make out the line that runs about 1/8" above the top of the fender gasket.


    Done!


  6. Top Of Page | #975
    MOD watersupply189's Avatar

    User Info Menu

    Quote Originally Posted by PWRWAGN View Post
    Yesterday I installed my Lund Riveted fender flares. They are an easy install but I wanted to do something to protect the paint on my new truck. Sand/grit can and will get between the rubber flare gasket and the truck paint. Over time with the vibration it will scratch/wear the paint down - sometimes to bare metal if enough time is given. I noticed this on my last truck - never got to bare metal but did get through the clear coat.

    To avoid that I decided to try to prevent this... From looking around the web it seems some people were trying to add double sided 3M tape and a few others were using protection film (like a clear bra material). I opted for trying the clear protection film.

    Incase anyone wants to do this Im including a few step photos as there was some trial and error.. First I screwed in the flare so I could see the fit. Once the fender was in place I used some thin masking tape to mark the curve - leaving about 1/8" gap above where the rubber gasket touches the truck. Then removed the fender.

    https://www.igotacummins.com/attachm...2&d=1527775616

    After that I used a strip of clear protection film which was about 5/8" wide. This was wide enough to fully cover where the rubber gasket hits the paint. Following the tape curve using a squeegee and install methods for that clear protection film. Difficult to see in photo but its there.

    https://www.igotacummins.com/attachm...3&d=1527775616

    Drying and cleaning the area. Film is installed - was very difficult to get a photo of as it is just about invisible once its on. Only the edges can be seen.

    https://www.igotacummins.com/attachm...4&d=1527775616

    Here you can see the fender installed again over the clear protection film. Again, difficult to photograph but you can just sorta make out the line that runs about 1/8" above the top of the fender gasket.

    https://www.igotacummins.com/attachm...5&d=1527775616

    Done!
    https://www.igotacummins.com/attachm...7&d=1527776873
    Man that looks awesome!!! Thanks for giving us step by step instructions. My factory flares kept peeling off even after the dealership used 3M double sided tape. They told me that they were not going to tackle it again so I took matters into my own hands and replaced the 3M tape with Gorilla two sided tape. Never had a problem with them peeling off again!


    2016 Ram 3500 4x4 Laramie Cummins, G56, Rough Country Leveling, MM3 EGRless Tuned by Double R Diesel

    2016 RAM 3500 4x4 Laramie Crew Cab ,G56

  7. Thanks cumminsbadgirl thanked for this post
  8. Top Of Page | #976
    PWRWAGN's Avatar

    User Info Menu

    One more thing I did and thought might be of interest to others...

    The dealership wanted about $1,800 to ceramic coat my truck for me. While there is some work involved especially on a big Mega there is no way I would pay $1,800 for this. I spent a total of about $250 on all supplies (most of which I will be using for the next year or so for general washing and care). The product I used is called Opti-Gloss and while I don't think it is technically a ceramic coating it is supposed to be 100 times harder than paint and provides a similar function. The cost for the Opti-Gloss was $87 on Amazon and was enough for me to do my wife Subaru as well as my mega cab. A little (20ccs) goes a LONG way. I covered the entire truck including wheels and wheel wells.

    https://www.amazon.com/gp/product/B0...?ie=UTF8&psc=1

    For anyone interested I followed the process outlined by a company called cougar chemical. They have 7 videos showing a step by step process from start to finish with the coating. I also bought most of my supplies from them.


    I have since washed both my wife car and my truck and washing is easy. It looks and performs like the best wax job you could ever dream of yet it lasts for about two years. I've seen a few spots of bird droppings since the coating and it reacts totally different as does bugs. The bird poop barely stays on - most of it just seems to bounce off. Most of the bug guts seem to fall off and what doesn't can easily be wiped off. The stuff is amazing.

    And it looks great!


  9. Top Of Page | #977
    Diesel Babe cumminsbadgirl's Avatar

    User Info Menu

    Quote Originally Posted by PWRWAGN View Post
    Yesterday I installed my Lund Riveted fender flares. They are an easy install but I wanted to do something to protect the paint on my new truck. Sand/grit can and will get between the rubber flare gasket and the truck paint. Over time with the vibration it will scratch/wear the paint down - sometimes to bare metal if enough time is given. I noticed this on my last truck - never got to bare metal but did get through the clear coat.

    To avoid that I decided to try to prevent this... From looking around the web it seems some people were trying to add double sided 3M tape and a few others were using protection film (like a clear bra material). I opted for trying the clear protection film.

    Incase anyone wants to do this Im including a few step photos as there was some trial and error.. First I screwed in the flare so I could see the fit. Once the fender was in place I used some thin masking tape to mark the curve - leaving about 1/8" gap above where the rubber gasket touches the truck. Then removed the fender.

    https://www.igotacummins.com/attachm...2&d=1527775616

    After that I used a strip of clear protection film which was about 5/8" wide. This was wide enough to fully cover where the rubber gasket hits the paint. Following the tape curve using a squeegee and install methods for that clear protection film. Difficult to see in photo but its there.

    https://www.igotacummins.com/attachm...3&d=1527775616

    Drying and cleaning the area. Film is installed - was very difficult to get a photo of as it is just about invisible once its on. Only the edges can be seen.

    https://www.igotacummins.com/attachm...4&d=1527775616

    Here you can see the fender installed again over the clear protection film. Again, difficult to photograph but you can just sorta make out the line that runs about 1/8" above the top of the fender gasket.

    https://www.igotacummins.com/attachm...5&d=1527775616

    Done!
    https://www.igotacummins.com/attachm...7&d=1527776873
    Wow !! Amazing and beautiful !!
    Thank You for posting and for being detailed oriented, you did a fabulous job, koodles
    Beautiful and gorgeous truck!!!!!!!!!!!!!


    "Cumminsbadgirl"
    2014 Cummins Mega 3500 ( Aisin ) 4X4
    MM3 Tuned by Double R Diesel


    2014 CUMMINS "BADGIRL" Laramie MC 3500 (Aisin) 4X4 MM3 Tuned by Double R Diesel *** EGR delete AFE CAI 4” FLO-PRO w/muffler 4" Zone lift, Federal Couragia 37’s with Black Rhinos,bed carpet kit, tail-gate assist, Retrax tunnau cover

    Previous "Cummins Badgirls" :
    2006 Cummins 2500 4x4
    2012 Cummins 2500 4x4

  10. Top Of Page | #978
    Diesel Babe cumminsbadgirl's Avatar

    User Info Menu

    Quote Originally Posted by PWRWAGN View Post
    One more thing I did and thought might be of interest to others...

    The dealership wanted about $1,800 to ceramic coat my truck for me. While there is some work involved especially on a big Mega there is no way I would pay $1,800 for this. I spent a total of about $250 on all supplies (most of which I will be using for the next year or so for general washing and care). The product I used is called Opti-Gloss and while I don't think it is technically a ceramic coating it is supposed to be 100 times harder than paint and provides a similar function. The cost for the Opti-Gloss was $87 on Amazon and was enough for me to do my wife Subaru as well as my mega cab. A little (20ccs) goes a LONG way. I covered the entire truck including wheels and wheel wells.

    https://www.amazon.com/gp/product/B0...?ie=UTF8&psc=1

    For anyone interested I followed the process outlined by a company called cougar chemical. They have 7 videos showing a step by step process from start to finish with the coating. I also bought most of my supplies from them.


    I have since washed both my wife car and my truck and washing is easy. It looks and performs like the best wax job you could ever dream of yet it lasts for about two years. I've seen a few spots of bird droppings since the coating and it reacts totally different as does bugs. The bird poop barely stays on - most of it just seems to bounce off. Most of the bug guts seem to fall off and what doesn't can easily be wiped off. The stuff is amazing.

    And it looks great!

    https://www.igotacummins.com/attachm...1&d=1527790876

    https://www.igotacummins.com/attachm...2&d=1527790876

    https://www.igotacummins.com/attachm...3&d=1527790876
    And another great post
    Definitely a great product/investment and worth buying!!
    Thank You again for sharing!!!


    "Cumminsbadgirl"
    2014 Cummins Mega 3500 ( Aisin ) 4X4
    MM3 Tuned by Double R Diesel


    2014 CUMMINS "BADGIRL" Laramie MC 3500 (Aisin) 4X4 MM3 Tuned by Double R Diesel *** EGR delete AFE CAI 4” FLO-PRO w/muffler 4" Zone lift, Federal Couragia 37’s with Black Rhinos,bed carpet kit, tail-gate assist, Retrax tunnau cover

    Previous "Cummins Badgirls" :
    2006 Cummins 2500 4x4
    2012 Cummins 2500 4x4

  11. Thanks PWRWAGN thanked for this post
    Likes watersupply189, walla2k5 liked this post
  12. Top Of Page | #979
    walla2k5's Avatar

    User Info Menu

    Quote Originally Posted by PWRWAGN View Post
    Yesterday I installed my Lund Riveted fender flares. They are an easy install but I wanted to do something to protect the paint on my new truck. Sand/grit can and will get between the rubber flare gasket and the truck paint. Over time with the vibration it will scratch/wear the paint down - sometimes to bare metal if enough time is given. I noticed this on my last truck - never got to bare metal but did get through the clear coat.

    To avoid that I decided to try to prevent this... From looking around the web it seems some people were trying to add double sided 3M tape and a few others were using protection film (like a clear bra material). I opted for trying the clear protection film.

    Incase anyone wants to do this Im including a few step photos as there was some trial and error.. First I screwed in the flare so I could see the fit. Once the fender was in place I used some thin masking tape to mark the curve - leaving about 1/8" gap above where the rubber gasket touches the truck. Then removed the fender.

    https://www.igotacummins.com/attachm...2&d=1527775616

    After that I used a strip of clear protection film which was about 5/8" wide. This was wide enough to fully cover where the rubber gasket hits the paint. Following the tape curve using a squeegee and install methods for that clear protection film. Difficult to see in photo but its there.

    https://www.igotacummins.com/attachm...3&d=1527775616

    Drying and cleaning the area. Film is installed - was very difficult to get a photo of as it is just about invisible once its on. Only the edges can be seen.

    https://www.igotacummins.com/attachm...4&d=1527775616

    Here you can see the fender installed again over the clear protection film. Again, difficult to photograph but you can just sorta make out the line that runs about 1/8" above the top of the fender gasket.

    https://www.igotacummins.com/attachm...5&d=1527775616

    Done!
    https://www.igotacummins.com/attachm...7&d=1527776873
    Great idea and thanks for the write-up.

    2013 Ram 2500 Big Horn 4x4 G56 CCLB 6.7, MM3 Tuned by Double R Diesel, Flo-Pro 4" Exhaust, Deviant Race Parts Goodies, ARP Head Studs, South Bend Clutch, 3" Thuren Front Springs w/Fox Shocks All-Around, Hell-Bent Steel Steering Box Brace, Thuren Track Bar, Air-Lift 5000, Deviant Race Parts 70" Traction Bars, Falken Wild-Peak AT3W LT285/75R18 (34.8x11.3x18) on Moto Metal MO970 18x9 +18mm

  13. Top Of Page | #980
    No Vacancy Power247's Avatar

    User Info Menu

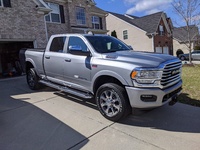
    Wash, clay bar and wax. She sure looks good all cleaned up!


    Greg
    2012 | RAM 2500 | CCSB | Custom tuned by Double R Diesel
    2016 | Heartland Pioneer | DS310

    Greg
    2019 | RAM 2500 | CCSB | 6.4 HEMI

Page 98 of 148 FirstFirst ... 488896979899100108 ... LastLast

Tags for this Thread

Posting Permissions

  • You may not post new threads
  • You may not post replies
  • You may not post attachments
  • You may not edit your posts
  •